We finish with the third and last part of the article in which we will see other determining factors to achieve our objective: a quality harvest.
Finally, we will see the methods of manicuring, drying, curing and conservation.
MANICURING
Manicuring is the process in which the stems and leaves of the buds are removed. We comment on the final part of the last article when it is the best time to cut our plants. Well, once we have made the momentous decision, we must choose the method of manicuring … and if we will do it with the plant material still fresh or already dried!
It is important that you look for a well ventilated place or adapt some method of air extraction, always with a carbon filter or similar, so that the strong odors that are going to be released do not accumulate. They can be very annoying and, if you have neighbors, you already know what this can mean … And even if they are a bit uncomfortable, the use of masks is not too much.
FRESH MANICURING
Pruning in green, with the vegetable matter still fresh, is the traditional method. It is a faster process and it is best to do it in a well ventilated place. The best thing to do in this way is that we can have the material ready for curing much sooner than if we let them dry before manicuring. What we usually do many growers when the time comes, is to get together with friends, we laugh, we put on gloves and, with a few scissors, to the mess. Nor is it too much for your compis to bring a work overalls or spare clothes and let them take a shower at the end: the smell can be so strong that even after having showered, the skin may still give off odor.

Scissors in action
DRY MANICURATION
This method may not be so used because it is slower and consists of cutting the plants by their main stem and letting them dry. Once the plants are dry, the manicuring work becomes easier and more comfortable, but more tedious, because if we want to leave some buds with top finishes, we will have to devote more time to the scissors. It is very fast by the time of harvest, but slower by the drying process.
You can remove the larger leaves and leave the rest; In this way we will achieve a more homogeneous drying and the buds will be more protected from light and air.
TRIMMERS
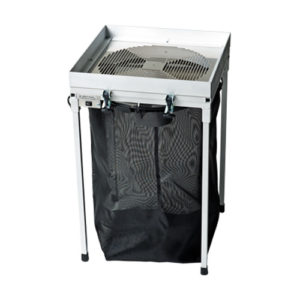
The use of trimmers has become very popular in recent years, making work easier and saving a lot of time. Taking into account the value for money, there are for all pockets (small, portable, industrial) and according to the method that is preferred (manual or automatic), all perfectly perform their function.
There are opposing opinions by the most sybarite growers about the use of these machines because they believe that a lot of resin is wasted … but what if instead of 4 seedlings, do you have 400 or 4000?
 |
 |
Automatic trimmer Workstation trimmer
DRYING
Surely drying is the process that most despairs almost all growers, especially those who are learning: a few months have passed since the beginning and the desire to make the first tasting increases day by day.
To follow an optimal drying process, we must also take into account certain parameters of light, ventilation, temperature and relative humidity, if we do not want all the work done to go to waste and ruin the harvest. Drying will determine the final aroma, taste and effect. Any factor that serves to accelerate the process will adversely affect our goal: a quality harvest.
ENABLE THE ROOM
The first step will be to enable a room for drying in which we can control the maximum parameters. Do not have more rooms or space? You can always recondition the room after having collected or purchased a closet, just for this process.
OPTIMAL CONDITIONS
Avoid direct light. Light degrades the resin and hinders the development process of cannabinoids such as THC, CBD and CBN.
Temperature. The appropriate temperature range is between 15oC and 20oC. With higher temperatures the terpenes evaporate easily and quickly. In addition, if we have a high temperature, it is likely that the plants will be dry ahead of time and cause us a great loss of weight and volume.
Humidity. A suitable range for the relative environmental humidity of the room or closet should be between 60% -65%. If it is higher you must include an exhaust extractor and an intake extractor to renew the air, never use a dehumidifier, since any accelerating factor will adversely affect us in the final quality. If it is lower, try to raise it with damp rags, never use a humidifier.
Ventilation. It is highly recommended to renew the air in the dried room. This does not mean that you use fans, another accelerating factor. Use an inlet extractor to renew the air and if you are going to use a fan, do not let the air flow give directly to the plants, better to aim at the floor or ceiling!
TRAYER OR DRYER
Once we have the drying room ready and the optimal parameters as controlled as possible, it is time to lay the plants: either hanging them or in a dryer.
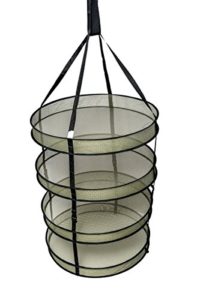
To mount a clothesline we can hang a few ropes from side to side or mount a folding clothesline. We will leave the flowers still on the branches and hang them upside down. Finding the right distance to avoid being in contact will provide us with a homogeneous drying, preventing mold from forming.
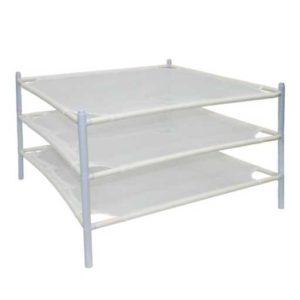
To use the dryer we must eliminate all the branches of the flowers and spread them on the surface at different levels. There are different shapes and sizes, but the essential thing here is that they are all made of perforated mesh fabric for the correct aeration of the buds. Even so, it is advisable to move them and turn them once a day.


Vertical drying mesh Stackable drying mesh
To know and check when the drying process has come to an end, take a branch and fold it. If this creaks means that the time has come and if it still does not, you should leave them a few more days.
THE CURED
Once we have all our flowers very dry and with the crispy branches, it is time to cure, the process in which the flowers lose the rest of the water, the ripening of the cannabinoids has just taken place and the chlorophyll breaks down. Chlorophyll is the pigment that gives plants the green color but that you should remove to avoid harmful residues that alter the original aroma and flavor.
ELIMINATING CHLOROPHYLL
The best way to suppress chlorophyll is by starting a good root cleaning before cutting. The reason for watering plants only with water during the last weeks is not only to eliminate possible remnants of fertilizers and supplements, but also to eliminate chlorophyll: when cutting the food supply to plants, they use chlorophyll as one of their Last food resources. Therefore, it is advisable to increase the amount of irrigation water and do it abundantly during the final root cleaning process.
BOXES
The best method to begin to cure the buds is to keep them in wooden boxes, preferably untreated, of materials such as pine, cedar or oak. There are models on the market designed specifically for this purpose, such as FUM-BOX or 00BOX, with which you can also control humidity. Another effective method is that of a lifetime: in shoe boxes.
CRYSTAL
Airtight glass boats are also a very good option. Although, you will have to open them to aerate them during the first weeks so as not to let the moisture accumulate that the buds will still shed.
ENVELOPES
Self-regulating moisture envelopes have appeared on the market for a while. They are composed of a gel with the property of providing or storing the necessary moisture to maintain optimum conservation. Depending on the quantity to be stored we can find different sizes and when they have solidified it will mean that it is time to renew them. If you do not know what is the optimal point of conservation, the introduction of these envelopes in your boats or boxes, is a very good solution.
THE TASTING
For the buds to be well cured (and hard as stones) they must be between 6 to 8 weeks (we can not talk about specific days, everything will depend on the conditions in which the cure has occurred), that is when it arrives the most anticipated moment, check the final result: the tasting.
THE CONSERVATION
Once we have the buds ready to consume, it’s time to preserve them well, without losing any of their properties.
For this, the first thing is to vacuum pack them in a bag, preferably opaque, so that it does not give them light, in any case.
The second, and that few get to do, is to keep them in a freezer once the vacuum bag is ready. In this way we ensure that our buds do not lose their properties, but in this way, we can keep them for a long time … months, years … it will depend on each one.
When it is time to take it out of the freezer for consumption, it will be enough to leave the bag about 6-8 hours outdoors before opening it and to be able to enjoy that preferred genetics again.
LATEST TIPS
After following all these tips, you will surely get quality crops. If you also want to be good growers, here are the last ones:
- Start by following a nutrient plan, write down all the parameters of the irrigation day (room conditions (temperature, humidity, ppm if you use CO2), temperature, EC and pH of the water, pH and EC of the substrate, etc.) Over time, you will acquire skills and knowledge with the you’ll be able to create your own tables. In addition, the experience gained will always be useful when you try other varieties.
- Before entering CO2 into a room, make sure that you always have all the parameters checked continuously, without any power outages.
- Work for a while the same genetics to learn about it, create the necessary annotations and thus correct the above mistakes. The first thing is the quality, you will have time to optimize the quantity.
- Test different culture techniques and methods (SOG, SCROG, HST, LST). Do it on one or two floors (or trays) because if something doesn’t go well, you’ll always have the rest.
- The best method of learning is trial and error. Try and test things, if you always do the same don’t expect to get different results (yes, don’t forget to write it all down, i.e. that information will be valuable to you later!)
- Be patient, this is the last unbalanced factor!


